
To download and install FileZilla for Minecraft server file transfers on Windows, Mac, or Linux, simply visit the official FileZilla website, choose the appropriate version for your OS, and follow the install wizard. Once installed, connect to your Minecraft server using your FTP or SFTP credentials and start dragging and dropping your server files like a digital boss.
Downloading and installing FileZilla for your Minecraft server file transfers (Windows, Mac, or Linux) is easier than getting a creeper to respect personal space. First, go to https://filezilla-project.org—don’t trust third-party sites unless you enjoy Russian roulette with malware. Download the FileZilla Client (not the Server one, unless you’ve got a secret FTP empire going on).
On Windows, run the installer like a champion, uncheck any sneaky bonus software, and launch. With macOS, open the .dmg, drag it into Applications, and pacify Gatekeeper with a security override. On Linux, flex those terminal muscles and use your package manager or Flatpak to grab it.
Once installed, open FileZilla and connect to your Minecraft server using the host IP, username, password, and correct port (usually 22 for SFTP). The left side shows your computer, the right side shows your server. Drag. Drop. Transfer. You’re now the file-moving deity your server didn’t know it needed.
And yes—FileZilla works beautifully across all systems, handles massive plugin uploads without flinching, and doesn’t randomly crash when you breathe too hard near your router. Total win.
Table of Contents
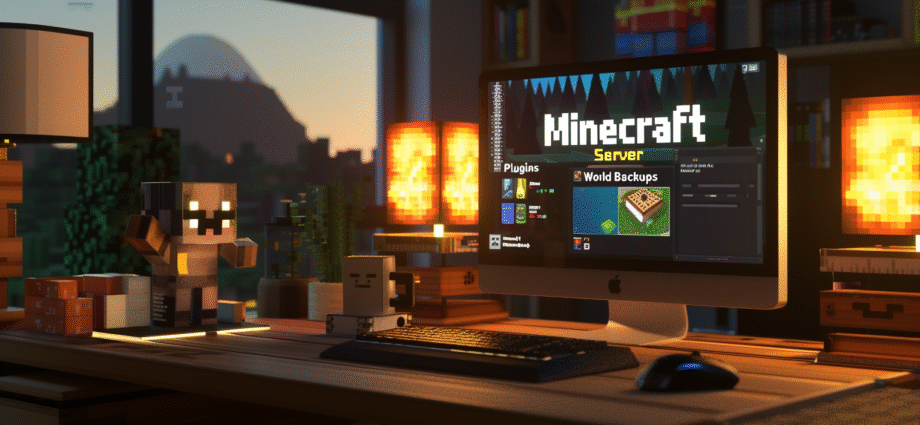
ToggleSo, you’ve decided to run your own Minecraft server. Bravo.
That means you’re now officially a server admin, a network tech, a babysitter for screaming 12-year-olds, and possibly a wizard. But before your server can rise to glory—or at least not crash every 3 minutes—you’ll need to upload and manage your server files like a civilized human being. Enter FileZilla.

How to Download and Install FileZilla for Minecraft Server File Transfers (Windows/Mac/Linux) is your new best friend in the land of endless .jar files and desperate Googling. Whether you’re running your empire on Windows, macOS, or some flavor of Linux you swear is “more customizable,” this article will help you tame FileZilla, the mighty beast of FTP. And no, this isn’t optional. You can’t just yeet your files into the void and hope they land on the server.
What Is FileZilla and Why Should Minecraft Server Owners Care?
Let’s keep it simple: FileZilla is like a magical portal between your computer and your Minecraft server. Instead of throwing files at your host and hoping for the best, you get a slick interface that lets you drag and drop files with the grace of a digital ballerina.
It uses FTP (File Transfer Protocol) or SFTP (Secure File Transfer Protocol), which are basically fancy ways of saying “your files will move from point A to point B without catching fire.” SFTP is more secure, and let’s be honest—if you’re hosting a Minecraft server in 2025, you don’t want some 14-year-old script kiddie hijacking your world file and replacing it with 10,000 anvils.
Here’s why FileZilla makes your life better:
-
It’s free. As in beer. As in really free. No catch, no trial, no sneaky ads for “FileZilla Platinum Ultra Pro Deluxe Edition.”
-
It works on all major operating systems, so you and your 15 friends with 12 different setups can all join the FTP party.
-
It has drag-and-drop support. Yes, you’re allowed to be lazy and efficient at the same time.
-
It lets you change file permissions without needing to summon a Linux demon or accidentally deleting the universe.
Bottom line? If you’re hosting a Minecraft server, FileZilla is your one-way ticket to sanity.
Preparing Your System Before Installing FileZilla
Before we leap into downloading FileZilla like a caffeinated llama, let’s make sure your system is ready. No, this doesn’t involve chanting or a blood pact with your PC (unless you’re on Arch Linux—then maybe).
For starters, check these things:
-
Admin Access: If your computer belongs to your mom, boss, or that one cousin who installed a “really safe firewall” that blocks everything but Minesweeper—stop. You need admin access.
-
Java Installed: You’re running a Minecraft server, so I’m assuming Java is somewhere in your life. If it’s not, go get it now. Seriously. FileZilla won’t help if your server can’t even start.
-
Your Server Info: You’ll need your host’s IP address, SFTP/FTP login credentials, and the port number (usually 21 for FTP, 22 for SFTP). Write it down. Tattoo it if necessary.
Oh, and pro tip: clear out some space. FileZilla won’t take up much room, but those world backups and plugin updates will. Don’t let a rogue disk cleanup app wipe your dreams.
How to Download FileZilla on Windows Like a Pro
Alright Windows users, this is your time to shine. (Or at least not download malware pretending to be FileZilla.)
Step 1: Head over to the official site: https://filezilla-project.org. Do not—repeat, DO NOT—click on that weird ad that says “Download FileZilla Now” from a site called FreeStuff4U. That’s how viruses happen and how grandma loses her retirement.
Step 2: Click the big friendly green button that says “Download FileZilla Client.” Not “Server.” Unless you’re running some wild homebrew hosting setup, you don’t need that.
Step 3: Run the installer. This is where they try to sneak in “bonus offers.” Uncheck them. Uncheck them all. Unless you really want a toolbar from 2007.
Step 4: Launch FileZilla like the champion you are. Bask in the retro glory of its interface. Yes, it still looks like it’s from Windows XP. It’s charming. Like a command line with buttons.
Step 5: Create a desktop shortcut. Trust me, you’ll be using this a lot. You may even develop a weird attachment to it.
Installing FileZilla on macOS Without Summoning Steve Jobs’ Ghost
Mac users, don’t worry—we’ve got your back. FileZilla plays surprisingly well with macOS, even if Apple prefers you stay inside its walled garden eating iSnacks and updating iThings.
Step 1: Visit https://filezilla-project.org and grab the Mac version of FileZilla Client. You’ll get a .dmg file—basically a software burrito.
Step 2: Open the .dmg like a boss and drag FileZilla into your Applications folder. If you double-click it directly from the mounted image, a penguin will slap you with a kernel panic. Just… don’t.
Step 3: If Gatekeeper blocks you from opening it, go to System Preferences > Security & Privacy > General and click “Open Anyway.” Yes, Apple thinks everything not sold by them is a threat. Yes, you can override it.

Step 4: You’re in. Fire up FileZilla and let that 2002-era interface warm your retina display. Add it to your dock so you can feel productive even when you’re not.
Step 5: Try not to double-click too fast. FileZilla on Mac sometimes needs a second to catch up. It’s thinking. Let it vibe.
Linux Users Unite: Downloading FileZilla Without Rage Quitting the Terminal
Ah yes, the Linux crowd—fearless, bearded, and absolutely allergic to GUIs (until they need one). You, brave command-line wanderer, already know that installing things on Linux is either delightfully simple or a cosmic joke. FileZilla falls into the “surprisingly not infuriating” category.
Step 1: Open your terminal. Feel powerful. Whisper “sudo” like it’s a dark spell.
For Debian/Ubuntu-based distros:
sudo apt-get update && sudo apt-get install filezilla
For Fedora:
sudo dnf install filezilla
For Arch (because of course you’re on Arch, you hipster):
sudo pacman -S filezilla
For Flatpak (the neutral Switzerland of Linux packaging):
flatpak install flathub org.filezillaproject.Filezilla
Step 2: Launch FileZilla. You can type filezilla in your terminal, or, if your desktop environment actually has icons, click the launcher. (XFCE users, squint and pretend it looks modern.)
Step 3: Bask in the joy that you didn’t need to compile anything from source. Let your Linux pride swell. You installed software, graphically. You rebel.
Step 4: Bonus tip—make a shortcut if your system lets you. Otherwise, add it to your panel or memorize the terminal command. You’re one of those users anyway.
Now you’re ready to connect to your Minecraft server without looking like you’re trying to hack the Pentagon every time you transfer a plugin.
Connecting FileZilla to Your Minecraft Server
Now comes the fun part—actually using FileZilla. Yes, you downloaded it. Yes, you installed it. Now let’s make those bits fly through cyberspace like enchanted pixelated pigeons.
Step 1: Open FileZilla and look at the top bar. That’s your “Quickconnect” panel. It’s where dreams are made. Plug in the following:
-
Host: Usually your server IP or domain. Add
sftp://if you’re using SFTP. -
Username: Provided by your host, or maybe just “root” if you’re self-hosted.
-
Password: It’s not “1234.” At least, it better not be.
-
Port: Usually 22 for SFTP or 21 for FTP. Ask your host if you’re unsure. Or summon their support via carrier pigeon.
Step 2: Hit “Quickconnect” and pray. If it connects, you’re golden. If it doesn’t, FileZilla will passive-aggressively scream at you in red text. Don’t panic. That’s just its love language.
Step 3: Once connected, you’ll see a two-panel view. On the left: your computer. On the right: your server. This is where the magic happens. Drag your world folder like a vengeful god and drop it into the server’s /home/minecraft/ or wherever it needs to go.
Step 4: Want to upload a plugin? Drop it in /plugins/. Want to change server properties? Drag server.properties into your local computer, edit it with Notepad++, then drag it back. Don’t forget to restart your server after editing, unless you enjoy confusion and broken dreams.
FileZilla doesn’t auto-sync, so it’s up to you to keep track of your edits. You are now the god of bits and bytes. Act accordingly.
Troubleshooting FileZilla Like a Certified Wizard
So, you tried connecting, and FileZilla isn’t cooperating. Welcome to the club. The error messages are cryptic, the logs are passive-aggressive, and somehow it’s all your fault.
Let’s break down the most common problems before you rage-quit and go live in the woods.
“Connection Timed Out”
Check your port. Are you using 22 for SFTP or 21 for FTP? Wrong port = no connection. Also, your firewall might be laughing at you from the shadows. Open that port in your router settings or hosting control panel.
“530 Login Authentication Failed”
You fat-fingered your password, didn’t you? It’s okay. Happens to the best of us. Try again. Or maybe you’re using the wrong username—double-check your host’s documentation. Also, case sensitivity is real. Don’t get cocky.
“Could Not Connect to Server”
This one’s vague. It could be the host, the internet, your cat walking across the keyboard—anything. Ping the server using ping yourdomain.com in terminal. If that fails, the server might actually be down. Yell at your host. That’s what they’re there for.
“Permission Denied”
You’re trying to drop files into a folder you don’t own. Welcome to Linux, where everything is locked unless you ask nicely with sudo. If it’s your server, make sure the SFTP user has access to the directory. If it’s not your server… ask whoever owns it. Or bribe them.
When in doubt, consult your hosting company’s FAQ, file a ticket, or scream into your Discord server until someone pities you.
Congratulations, you magnificent beast!
You’ve now survived the labyrinth of How to Download and Install FileZilla for Minecraft Server File Transfers (Windows/Mac/Linux) without throwing your PC out a window or crying into your creeper plushie. That’s progress.
Whether you’re launching your first pixelated empire or just trying to upload one more mod that absolutely will not crash the server (spoiler: it will), FileZilla is your trusty tool. It may not look flashy, but it does the job—reliably, securely, and without asking for money or your firstborn child.
You’ve learned how to install it on any operating system, dodge digital landmines like sneaky adware, connect like a champ, and even troubleshoot without sacrificing a goat. You, my friend, are now a certified FTP overlord.
Now go forth and upload those files like the glorious server admin you were born to be. And maybe—just maybe—back up your world before doing anything stupid.
FAQs
1. Can I use FileZilla for Bedrock servers?
Yes, you can use FileZilla for Bedrock just like you do for Java Edition—so long as your hosting provider gives you FTP or SFTP access. The interface and process are the same, but the folders will be a bit different. No /plugins/, but plenty of chaos.
2. Is FileZilla free or will it steal my soul?
Totally free. No soul theft, no sneaky “free trial” that ends with tears. Just don’t click on sketchy third-party download sites, and you’re golden.
3. Why does FileZilla keep disconnecting?
Most servers auto-disconnect idle sessions after a few minutes. It’s not personal, just policy. Reconnect when needed, or change your timeout settings in the FileZilla preferences.
4. Can I use FileZilla to edit server configs?
You bet. Just download the .properties file, edit it locally (use Notepad++ or any decent text editor), and re-upload it. Just don’t edit live on the server—you risk corrupting files or summoning gremlins.
5. What if my host already has a file manager?
That’s cute. File managers in control panels are fine for tiny changes, but FileZilla is way faster, more reliable, and doesn’t time out when you’re halfway through a 2GB world upload. Use FileZilla like the pro you now are.
Let’s Play Minecraft Together!
💬 Hey block-wranglers! Did you manage to download FileZilla without accidentally installing a cursed toolbar from 2006? Did your creeper outside the window approve your file transfer skills? Share your triumphs, tragedies, and tales of tech-induced trauma in the comments below!
🎮 Wanna brag about your perfectly organized plugin folders or show off your “world” file that’s bigger than your social life?
Join me on Discord for digital high-fives, tech rants, and probably unsolicited memes.
📲 Follow me on social media for more Minecraft magic, tips that actually work, and enough sarcasm to fuel your next Redstone invention.